-
UPDATE
~~~~~~~
Posting updates here creates a burden for AB-Nest admins because of the number of pictures and the fact that this is a sticky post. So future minor updates will be posted as a REPLY, and only major updates will be included HERE.
————————————————————————
Several updates back, the silo was made much smaller (e.g. 5SR max) and the gem yields in the lab were reduced to 40% of what they once were (e.g. max of 20 gems for 3SR). All the recipes work the same to get the Energonicons, but these changes render the gem farming strategies, at the bottom of this guide, virtually unusable. Which of course was Rovio’s intention.Because the “Updating Your Progress” bug is partly caused by the number of materials, try to make SURE your game is connected to FB/GC before touching the silo, missions, or the lab. Rovio has finally implemented a stop-gap, explained HERE. There are other work-arounds posted but none of these seem to work 100% for all players.
~~~~~~~~~~~~~~~~~~~~~~~~~~~~~~~~~~~~This guide shows how to unlock all 48 (currently available) ENERGONICONS. The basic method to unlock them is:
1) Tap to enter Professor Pig’s Lab under large metal pig dome.
2) Feed Professor Pig’s machine 3 materials. These can any combination, all the same, all 3 different, 2 + 1, etc. There are specific combinations, discussed below, but the order does not matter.
The materials are stored in your silo:
AUTOBOT (BIRD) SIDE:

BIRDIUM (BI)

AUTOCOG (AG)

ANGER CHIP (AC)

~~~~~~~~~~~~~~~~~~~~~~~~~~~~~~~~~~~~
DECEPTICON (PIG) SIDE:

PIG IRON (PI)

DECEPTIGEAR (DG)

BADNESS PROCESSOR (BP)

~~~~~~~~~~~~~~~~~~~~~~~~~~~~~~~~~~~~
And lastly, SUPER RAREIUM (SR)

.
3) The output of the machine is then 5 different “items”, shown on the 5 little screens, including
– Coins
– Gems
– Materials
– EnergonIcons4) You are randomly awarded one of the five. It is not known if each of the 5 have equal probability.
5) If you don’t like what you got, you then may choose to “RETRY” by paying gems
– 1st retry, 5 gems
– 2nd, 10 gems
– 3rd, 20 gems
– 4th (last) try, 40 gems, the 5th item is immediately awardedEach time you RETRY, the screen for the item you rejected, goes blank, and the next roll of the dice only includes the remaining items.
6) If you are awarded an Energonicon, it is permanent and can be used within all future levels by any bot.
~~~~~~~~~~~~~~~~~~~~~~~~~~~~~~~~~~~~
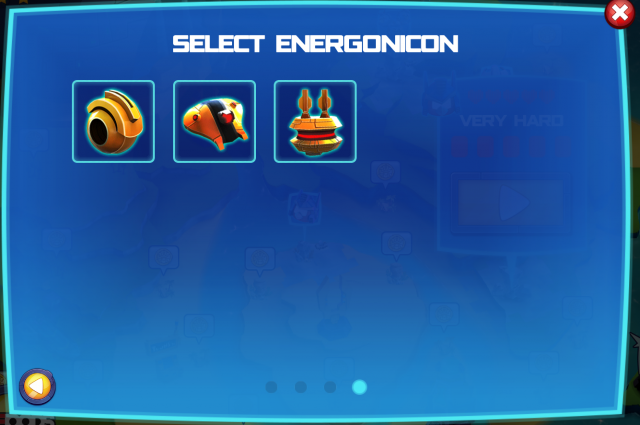
Here are the four pages of ENERGONICONS. You can view these pages as follows:
– Select a level to play
– In the “choose your energonicon” screen, tap on the small magnifying glassp1
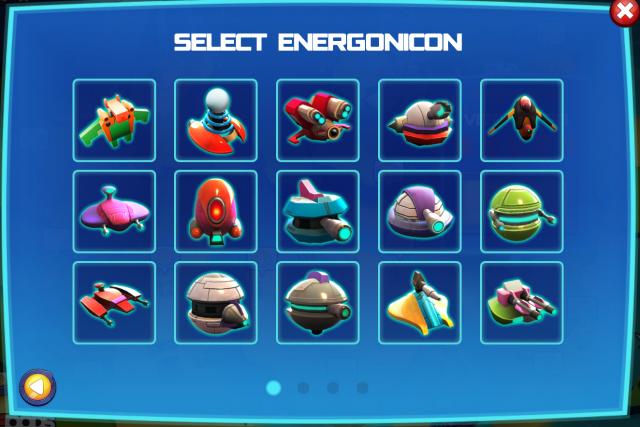
p2
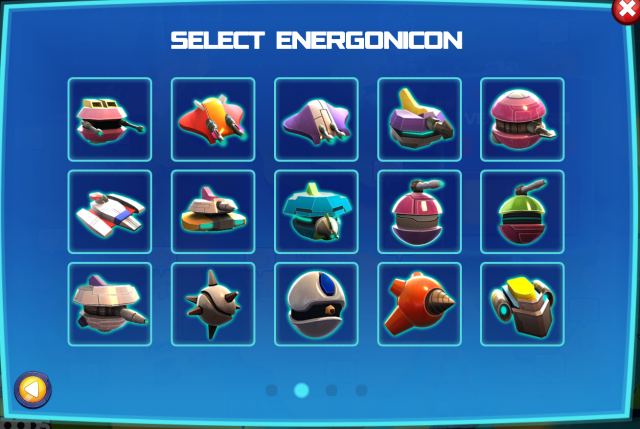
p3
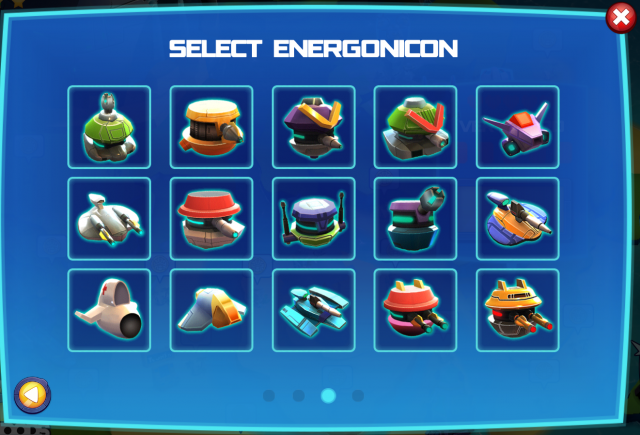
p4
~~~~~~~~~~~~~~~~~~~~~~~~~~~~~~~~~~~~~~~~~~~~~
All 48 EnergonIcons:
#01: STRIKEBOT

#02: ELECTROBLAST

#03: LAZERBLAST

#04: DOUBLESLAM

#05: GOLDBRICK

#06: FIREBLAST

#07: CONFUDDLEBOT

#08: IONIZOR

#09: LAZERPHAZOR

#10: P-SHOOTER

#11: MADBOT

#12: POWERSHOCK

#13: LIGHTNINGSLAM

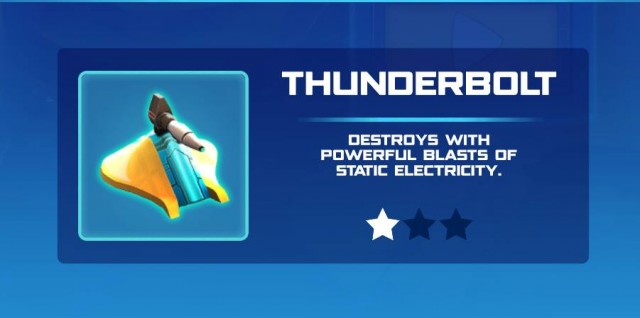
#14: THUNDERBOLT
#15: 3-FORCE

#16: ENERGYBLAST

#17: FOCUSFIRE

#18: SPLINTER

#19: MEGABLAST

#20: PULSAR

#21: FASTFIRE

#22: STORMBLAST

#23: WAVEBURST

#24: BUBBLEBOT

#25: BUBBLEPOP

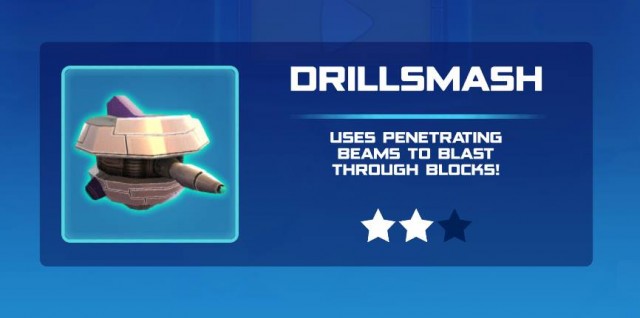
#26: DRILLSMASH
#27: REFLECTRON

#28: SHIELDOR

#29: BOOMSHAKE

#30: POWERBOT

#31: EVAPORTRON

#32: SUB-WOOFER

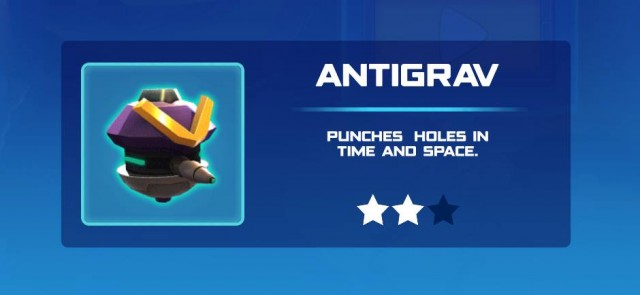
#33: ANTIGRAV
#34: SUBSPACE

#35: ENERBOT

#36: STONECUTTER

#37: SNIPERNAUT

#38: MORTARNIK

#39: CLUSTERBURST

#40: GRAVITRON

#41: HEALTHPACK

#42: GHOSTBOT

#43: RAPIDFIRE

#44: PHOTOBLAST

#45: LAVATRON

#46: GOLDSLAM

#47: PIGGYBLAST

#48: GLASSOR

~~~~~~~~~~~~~~~~~~~~~~~~~~~~~~~~~~~~~~~~~~~~~~~
Recipes for obtaining all the ENERGONICONS …
~~~~~~~~~~~~~~~
ENERGONICONS
~~~~~~~~~~~~~~~
PI = PIG IRON
DG = DECEPTIGEAR
BP = BADNESS PROCESSOR
BI = BIRDIUM
AG = AUTOCOG
AC = ANGER CHIP
SR = SUPER RAREIUM
———————————————————————————-
Energonicon #s : Name – – Description (# stars) = RECIPE(s)
———————————————————————————-#01: STRIKEBOT – – Calls in air support! (Old default item) (1★) = (DEFAULT)
#02: ELECTROBLAST – – Activates a paralyzing EMP! (Old default item) (1★) = (DEFAULT)
#03: LAZERBLAST – – Laser sentry blasts. (1★) = 2xPI, 1xAG _or_ 2xDG, 1xBI _or_ 2xBI, 1xSR
#04: DOUBLESLAM – – Fires two powerful explosives! (1★) = 1xPI, 2xBI _or_ 1xBP, 2xBI _or_ 1xDG, 1xBP, 1xAG _or_ 2xAG, 1xSR
#05: GOLDBRICK – – Multiplies collected Coins! (1★) = 1xPI, 1xBI, 1xAC _or_ 1xBP, 1xAG, 1xAC _or_ 1xPI, 2xAC _or_ 1xBI, 2xAC
#06: FIREBLAST – – Burns everything to the ground! (1★) = 1xPI, 1xDG, 1xAC _or_ 1xDG, 2xAG _or_ 3xBI
#07: CONFUDDLEBOT – – Generates an IQ sapping energy field. (1★) = 1xBI, 1xAC, 1xSR _or_ 1xBP, 2xAC
#08: IONIZOR – – Fires focused laser blasts (1★) = 1xPI, 2xAG _or_ 1xDG, 2xBI _or_ 1xBI, 1xAG, 1xAC
#09: LAZERPHAZOR – – Shoots fast blasts of phased light. (1★) = 2xBI, 1xAG _or_ 2xBI, 1xAC _or_ 2xAG, 1xAC _or_ 1xBP, 1xAG, 1xSR
#10: P-SHOOTER – – Sprays laser blasts at enemies! (1★) = 2xPI, 1xBP _or_ 1xPI, 2xDG _or_ 1xPI, 1xDG, 1xBI
#11: MADBOT – – Unleashes a flurry of energy blasts. (1★) = 2xPI, 1xDG _or_ 3xDG _or_ 2xDG, 1xSR _or_ 1xDG, 1xBP, 1xBI
#12: POWERSHOCK – – Creates a powerful shockwave! (1★) = 1xPI, 2xSR _or_ 2xBP, 1xAG
#13: LIGHTNINGSLAM – – Strikes enemies and towers with lightning! (1★) = 1xPI, 1xBP, 1xBI _or_ 2xDG, 1xAG _or_ 1xBP, 1xBI, 1xAG _or_ 3xAG
#14: THUNDERBOLT – – Destroys with powerful blasts of static electricity. (1★) = 1xPI, 1xSR, 1xAG _or_ 1xDG, 1xBI, 1xAG _or_ 1xBI, 1xAG, 1xSR
#15: 3-FORCE – – Blasts a trio of destructive energy! (1★) = 3xPI _or_ 1xDG, 1xAG, 1xSR
#16: ENERGYBLAST – – Releases rapid-fire energy blasts! (1★) = 2xPI, 1xAC _or_ 2xPI, 1xSR _or_ 1xPI, 1xDG, 1xBP _or_ 1xPI, 1xBP, 1xAC
#17: FOCUSFIRE – – Shoots rapid and focused blasts! (1★) = 1xPI, 1xBP, 1xAG _or_ 1xPI, 1xSR, 1xBI _or_ 1xPI, 2xBP
#18: SPLINTER – – Launches strong blasts to cut through wood! (1★) = 2xDG, 1xAC
#19: MEGABLAST – – Launches highly explosive warheads! (1★) = 1xPI, 1xBI, 1xAG _or_ 1xDG, 1xBP, 1xBI _or_ 1xDG, 1xBI, 1xAC _or_ 1xBI, 2xAG _or_ 1xDG, 1xBI, 1xSR
#20: PULSAR – – Uses a tractor beam to pull down towers! (1★) = 1xPI, 1xAG, 1xAC _or_ 1xDG, 2xAC _or_ 2xBP, 1xBI
#21: FASTFIRE – – Launches barrage of missiles! (2★) = 1xPI, 2xAC _or_ 2xAC, 1xSR
#22: STORMBLAST – – Summons epic lightning storms! (2★) = 3xAC
#23: WAVEBURST – – Screeches ultra-sonic blasts! (2★) = 2xPI, 1xBI _or_ 1xPI, 1xDG, 1xAG
#24: BUBBLEBOT – – An explosive bubble generator (2★) = 1xAG, 1xAC, 1xSR _or_ 2xAG, 1xAC
#25: BUBBLEPOP – – Inflates bubbles of energy to blast enemies! (2★) = 1xDG, 1xAC, 1xSR _or_ 2xBP, 1xBI
#26: DRILLSMASH – – Uses penetrating beams to blast through blocks! (2★) = 1xBP, 1xBI, 1xSR _or_ 1xBP, 1xAG, 1xSR
#27: REFLECTRON – – Returns damage to the sender! (2★) = 1xDG, 1xAG, 1xAC _or_ 1xBP, 1xBI, 1xAC
#28: SHIELDOR – – Activates a protective energy shield. (Old default item) (2★) = (DEFAULT)
#29: BOOMSHAKE – – Creates devastating earthquakes! (2★) = 1xPI, 1xBP, 1xAC _or_ 1xDG, 1xAG, 1xSR
#30: POWERBOT – – Multiplies the Transformer’s damage! (2★) = 1xPI, 1xDG, 1xSR _or_ 2xDG, 1xAC
#31: EVAPORTRON – – Makes blocks vanish! (2★) = 1xBI, 2xAC _or_ 1xAG, 2xAC
#32: SUB-WOOFER – – Shakes towers with Earth-shattering bass! (2★) = 1xDG, 2xBP _or_ 2xBP, 1xAC
#33: ANTIGRAV – – Punches holes in time and space. (2★) = 1xPI, 2xBP _or_ 1xDG, 2xSR
#34: SUBSPACE – – Creates crushing gravitational singularities (2★) = 1xPI, 1xBP, 1xSR _or_ 2xDG, 1xBP
#35: ENERBOT – – Absorbs energy from enemies! (2★) = 1xDG, 1xBP, 1xAG _or_ 1xDG, 1xBP, 1xSR _or_ 1xDG, 1xBI, 1xSR
#36: STONECUTTER – – Cuts through stone with shards of energy! (2★) = 2xDG, 1xSR _or_ 3xBP
#37: SNIPERNAUT – – Snipes with a beam of photons! (2★) = 2xBP, 1xSR _or_ 1xDG, 2xAC
#38: MORTARNIK – – Summons orbital defence cannons. (2★) = 1xBP, 2xAG _or_ 1xBI, 2xSR
#39: CLUSTERBURST – – Sends a cluster of explosives to destroy any enemy! (2★) = 2xAG, 1xSR _or_ 1xAG, 2xSR
#40: GRAVITRON – – Fires pulses of anti-gravity. (2★) = 1xPI, 1xSR, 1xAC _or_ 1xDG, 1xBP, 1xAC
#41: HEALTHPACK – – Repairs Transformers during battle! (3★) = 1xBP, 2xAC _or_ 1xAG, 2xSR _or_ 1xAC, 2xSR
#42: GHOSTBOT – – Turns Transformers invisible! (3★) = 2xBP, 1xSR _or_ 1xBP, 2xSR
#43: RAPIDFIRE – – Unleashes a storm of missiles! (3★) = 2xAC, 1xSR _or_ 1xBP, 1xAC, 1xSR _or_ 1xBI, 2xSR
#44: PHOTOBLAST – – Unleashes rapid-fire photon beams! (3★) = 2xBP, 1xAC _or_ 3xSR
#45: LAVATRON – – Uses huge balls of lava to obliterate the enemy! (4★) = 1xBP, 2xSR
#46: GOLDSLAM – – Forge coins from Energon. (4★) = 1xBP, 1xAC, 1xSR
#47: PIGGYBLAST – – Calls minion pigs into the fight! (4★) = 3xSR
#48: GLASSOR – – Rains Destruction from the skies! (4★) = 1xAC, 2xSR~~~~~~~~~~~~~~~~~~~~~~~~~~
HIGH RARITY / MOST USEFUL
~~~~~~~~~~~~~~~~~~~~~~~~~~
4 STARS:
46: GOLDSLAM – – Forge coins from Energon. (4★) = 1xBP, 1xSR, 1xAC
Use when you expect the level to have a lot buildings/trees/rocks you will need to shoot to convert back to normal, which collects Energon. It converts the Energon to gold. Each level 3 use generates 400 gold.48: GLASSOR – – Rains Destruction from the skies! (4★) = 2xSR, 1xAC
Use especially when your bot is a “sharp-shooter” & you need a broad-coverage weapon to help destroy block towers.45: LAVATRON – – Uses huge balls of lava to obliterate the enemy! (4★) = 1xBP, 2xSR
Hurls the same magma/fire balls as the walking towers. Not as effective as Glassor or Photoblast.47: PIGGYBLAST – – Calls minion pigs into the fight! (4★) = 3xSR
Hurls pigs instead of magma balls. Use for a laugh, but not as effective as Glassor or Photoblast.– – – – – – – – – – – – – – – – – – – – – – – – – – – – – – – – – – – – –
3 STARS:
41: HEALTHPACK – – Repairs Transformers during battle! (3★) = 1xBP, 2xAC _or_ 2xSR, 1xAG _or_ 2xSR, 1xAC
Little benefit unless charged to level 3.42: GHOSTBOT – – Turns Transformers invisible! (3★) = 2xBP, 1xSR _or_ 1xBP, 2xSR
Seemingly little benefit even fully charged.43: RAPIDFIRE – – Unleashes a storm of missiles! (3★) = 1xSR, 2xAC _or_ 1xBP, 1xSR, 1xAC _or_ 2xSR, 1xBI
Similar to High Octane Bumblebee.44: PHOTOBLAST – – Unleashes rapid-fire photon beams! (3★) = 2xBP, 1xAC _or_ 3xSR
Use especially when your bot fires a broad coverage weapon & you need a sharp-shooter weapon to kill flying pigs, mortars, etc.– – – – – – – – – – – – – – – – – – – – – – – – – – – – – – – – – – – – –
HONORABLE MENTION:
28: SHIELDOR – – Activates a protective energy shield. (Old default item) (2★) = (DEFAULT)
Probably the best defensive item.05: GOLDBRICK – – Multiplies collected Coins! (1★) = 1xPI, 2xAC _or_ 1xBI, 2xAC
Very useful with high level bots that do not need supplemental offense or defense. Use when you expect the level to have a lot of the yellow/gold Energon Cubes (maximizes coins). Charged to level 1 = 2X, level 2 = 3X and level 3 = 4X.~~~~~~~~~~~~~~~~~~~~~~~~~~~~~~~~~~~~~~~~~~~~~~~~~~~~~~~~~~
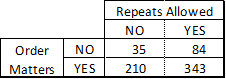
There are a total of 84 recipes. This is derived from combinations of 3, from 7, where repeats are allowed, but order does not matter.
~~~~~~~~
RECIPES
~~~~~~~~
PI = PIG IRON
DG = DECEPTIGEAR
BP = BADNESS PROCESSOR
BI = BIRDIUM
AG = AUTOCOG
AC = ANGER CHIP
SR = SUPER RAREIUM
—————————————————–
If you already have an claimed Energonicon from a specific recipe, that recipe will not yield that Energonicon again. However, you can receive a duplicate Energonicon from an alternate recipe. Lastly, some recipes yield 2 different Energonicons.
—————————————————–
Recipe # / Recipe = E#s, Energonicon
—————————————————–
1) 3xPI = #15, 3-FORCE
2) 2xPI, 1xDG = #11, MADBOT
3) 2xPI, 1xBP = #10, P-SHOOTER
4) 2xPI, 1xBI = #23, WAVEBURST
5) 2xPI, 1xAG = #3, LAZERBLAST
6) 2xPI, 1xAC = #16, ENERGYBLAST
7) 2xPI, 1xSR = #16, ENERGYBLAST
8) 1xPI, 2xDG = #10, P-SHOOTER
9) 1xPI, 1xDG, 1xBP = #16, ENERGYBLAST
10) 1xPI, 1xDG, 1xBI = #10, P-SHOOTER
11) 1xPI, 1xDG, 1xAG = #23, WAVEBURST
12) 1xPI, 1xDG, 1xAC = #6, FIREBLAST
13) 1xPI, 1xDG, 1xSR = #30, POWERBOT
14) 1xPI, 2xBP = #33, ANTIGRAV _or_ = #17, FOCUSFIRE
15) 1xPI, 1xBP, 1xBI = #13, LIGHTNINGSLAM
16) 1xPI, 1xBP, 1xAG = #17, FOCUSFIRE
17) 1xPI, 1xBP, 1xAC = #29, BOOMSHAKE _or_ = #16, ENERGYBLAST
18) 1xPI, 1xBP, 1xSR = #34, SUBSPACE
19) 1xPI, 2xBI = #4, DOUBLESLAM
20) 1xPI, 1xBI, 1xAG = #19, MEGABLAST
21) 1xPI, 1xBI, 1xAC = #5, GOLDBRICK
22) 1xPI, 1xSR, 1xBI = #17, FOCUSFIRE
23) 1xPI, 2xAG = #8, IONIZOR
24) 1xPI, 1xAG, 1xAC = #20, PULSAR
25) 1xPI, 1xSR, 1xAG = #14, THUNDERBOLT
26) 1xPI, 2xAC = #21, FASTFIRE _or_ = #5, GOLDBRICK
27) 1xPI, 1xSR, 1xAC = #40, GRAVITRON
28) 1xPI, 2xSR = #12, POWERSHOCK
29) 3xDG = #11, MADBOT
30) 2xDG, 1xBP = #34, SUBSPACE
31) 2xDG, 1xBI = #3, LAZERBLAST
32) 2xDG, 1xAG = #13, LIGHTNINGSLAM
33) 2xDG, 1xAC = #18, SPLINTER _or_ = #30, POWERBOT
34) 2xDG, 1xSR = #36, STONECUTTER _or_ = #11, MADBOT
35) 1xDG, 2xBP = #32, SUB-WOOFER
36) 1xDG, 1xBP, 1xBI = #19, MEGABLAST _or_ = #11, MADBOT
37) 1xDG, 1xBP, 1xAG = #35, ENERBOT _or_ = #4, DOUBLESLAM
38) 1xDG, 1xBP, 1xAC = #40, GRAVITRON
39) 1xDG, 1xBP, 1xSR = #35, ENERBOT
40) 1xDG, 2xBI = #8, IONIZOR
41) 1xDG, 1xBI, 1xAG = #14, THUNDERBOLT
42) 1xDG, 1xBI, 1xAC = #19, MEGABLAST
43) 1xDG, 1xBI, 1xSR = #35, ENERBOT _or_ = #19, MEGABLAST
44) 1xDG, 2xAG = #6, FIREBLAST
45) 1xDG, 1xAG, 1xAC = #27, REFLECTRON
46) 1xDG, 1xAG, 1xSR = #29, BOOMSHAKE _or_ = #15, 3-FORCE
47) 1xDG, 2xAC = #20, PULSAR _or_ = #37, SNIPERNAUT
48) 1xDG, 1xAC, 1xSR = #25, BUBBLEPOP
49) 1xDG, 2xSR = #33, ANTIGRAV
50) 3xBP = #36, STONECUTTER
51) 2xBP, 1xBI = #25, BUBBLEPOP _or_ = #20, PULSAR
52) 2xBP, 1xAG = #12, POWERSHOCK
53) 2xBP, 1xAC = #44, PHOTOBLAST _or_ = #32, SUB-WOOFER
54) 2xBP, 1xSR = #37, SNIPERNAUT _or_ = #42, GHOSTBOT
55) 1xBP, 2xBI = #4, DOUBLESLAM
56) 1xBP, 1xBI, 1xAG = #13, LIGHTNINGSLAM
57) 1xBP, 1xBI, 1xAC = #27, REFLECTRON
58) 1xBP, 1xBI, 1xSR = #26, DRILLSMASH
59) 1xBP, 2xAG = #38, MORTARNIK
60) 1xBP, 1xAG, 1xAC = #5, GOLDBRICK
61) 1xBP, 1xAG, 1xSR = #26, DRILLSMASH _or_ = #9, LAZERPHAZOR
62) 1xBP, 2xAC = #41, HEALTHPACK _or_ = #7, CONFUDDLEBOT
63) 1xBP, 1xAC, 1xSR = #46, GOLDSLAM _or_ = #43, RAPIDFIRE
64) 1xBP, 2xSR = #45, LAVATRON _or_ = #42, GHOSTBOT
65) 3xBI = #6, FIREBLAST
66) 2xBI, 1xAG = #9, LAZERPHAZOR
67) 2xBI, 1xAC = #9, LAZERPHAZOR
68) 2xBI, 1xSR = #3, LAZERBLAST
69) 1xBI, 2xAG = #19, MEGABLAST
70) 1xBI, 1xAG, 1xAC = #8, IONIZOR
71) 1xBI, 1xAG, 1xSR = #14, THUNDERBOLT
72) 1xBI, 2xAC = #31, EVAPORTRON _or_ = #5, GOLDBRICK
73) 1xBI, 1xAC, 1xSR = #7, CONFUDDLEBOT
74) 1xBI, 2xSR = #38, MORTARNIK _or_ = #43, RAPIDFIRE
75) 3xAG = #13, LIGHTNINGSLAM
76) 2xAG, 1xAC = #9, LAZERPHAZOR _or_ = #24, BUBBLEBOT
77) 2xAG, 1xSR = #39, CLUSTERBURST _or_ = #4, DOUBLESLAM
78) 1xAG, 2xAC = #31, EVAPORTRON
79) 1xAG, 1xAC, 1xSR = #24, BUBBLEBOT
80) 1xAG, 2xSR = #39, CLUSTERBURST _or_ = #41, HEALTHPACK
81) 3xAC = #22, STORMBLAST
82) 2xAC, 1xSR = #43, RAPIDFIRE _or_ = #21, FASTFIRE
83) 1xAC, 2xSR = #48, GLASSOR _or_ = #41, HEALTHPACK
84) 3xSR = #44, PHOTOBLAST _or_ = #47, PIGGYBLAST~~~~~~~~~~~~~~~~~~
HIGH YIELD RECIPES
~~~~~~~~~~~~~~~~~~
AC: (73) 1xBI, 1xAC, 1xSR = 5000, 5000, Gemx25, ACx05, ACx05
AC: (74) 1xBI, 2xSR = 7500, 7500, Gemx20, ACx05, ACx05
AC: (78) 1xAG, 2xAC = 4000, 4000, Gemx25, ACx05, ACx05
AC: (82) 2xAC, 1xSR = 10000, 7500, 7500, ACx05, ACx05AG: (72) 1xBI, 2xAC = 4000, 4000, Gemx20, AGx06, AGx06
AG: (77) 2xAG, 1xSR = 4000, 4000, Gemx20, AGx06, AGx06
AG: (17) 1xPI, 1xBP, 1xAC = 4000, 4000, Gemx20, AGx05, AGx05
AG: (57) 1xBP, 1xBI, 1xAC = 4000, 4000, Gemx20, AGx05, AGx05
AG: (71) 1xBI, 1xAG, 1xSR = 4000, 3000, Gemx20, AGx05, AGx05
AG: (76) 2xAG, 1xAC = 3000, 3000, Gemx15, AGx05, AGx05BP: (28) 1xPI, 2xSR = 7500, 7500, Gemx20, BPx05, BPx05
BP: (54) 2xBP, 1xSR = 10000, 10000, Gemx20, BPx05, BPx05DG: (14) 1xPI, 2xBP = 4000, 4000, Gemx20, DGx06, DGx06
DG: (34) 2xDG, 1xSR = 4000, 4000, Gemx20, DGx06, DGx06
DG: (13) 1xPI, 1xDG, 1xSR = 3000, 3000, Gemx20, DGx05, DGx05
DG: (30) 2xDG, 1xBP = 3000, 3000, Gemx15, DGx05, DGx05
DG: (51) 2xBP, 1xBI = 4000, 4000, Gemx20, DGx05, DGx05Gem: (49) 1xDG, 2xSR = 7500, 10000, Gemx35, Gemx35, 7500
Gem: (80) 1xAG, 2xSR = 7500, 10000, Gemx35, Gemx35, 7500
Gem+Coin: (83) 1xAC, 2xSR = 15000, 12000, Gemx35, Gemx35, 12000
Gem+Coin: (84) 3xSR = 15000, 12000, Gemx50, Gemx50, 12000SR+BP: (18) 1xPI, 1xBP, 1xSR = 5000, 5000, Gemx25, SRx03, BPx05
SR+BP: (35) 1xDG, 2xBP = 4000, 4000, Gemx25, SRx03, BPx05
SR+Gem: (63) 1xBP, 1xAC, 1xSR = 12000, 12000, Gemx35, SRx03, SRx03
SR+Gem: (64) 1xBP, 2xSR = 12000, 12000, Gemx35, SRx03, SRx03~~~~~~~~~~~~~~~~~~~~~~~~~~~~~~~~~~~~~~~~~~~~~~~~~~~~~~~~~~~~~~~~~
STRATEGIES: Use the Lab to Fill the Materials Silo and Earn Gems
~~~~~~~~~~~~~~~~~~~~~~~~~~~~~~~~~~~~~~~~~~~~~~~~~~~~~~~~~~~~~~~~~– – – – – – – – – – – – – – – – – –
AS MENTIONED ABOVE, THE GEM YIELDS HAVE BEEN REDUCED TO 40% OF THE PRIOR LEVEL, AND THE SILO CAPACITY IS SMALL, SO THE STRATEGIES BELOW ARE MUCH LESS EFFECTIVE !!
– – – – – – – – – – – – – – – – – –If you use the highest yield recipes identified above, and then if you get COINS, ALWAYS spend gems to RETRY, you get an average output as follows:
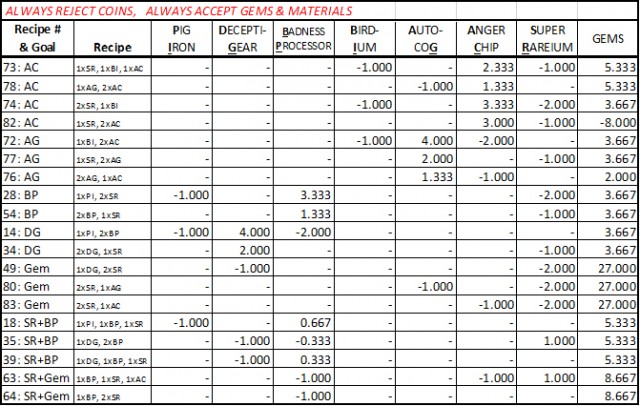
If you play around with this table, you will find it is difficult to design combinations of recipes which end up being positive, on average, for all materials. On the other hand, this method does have a positive yield for gems. For just one example, you can combine running recipe #54 once, plus recipe #34 twice, plus recipe 35 four times, and you will have an average yield from these 7 recipes, of 1xSR and 32.333 gems.
If you change your strategy, to ALWAYS reject coins, and in addition, reject gems IF you get them on the first try (unless you are purposely trying for gems with recipes 49, 80, 83), then the average yields will be:
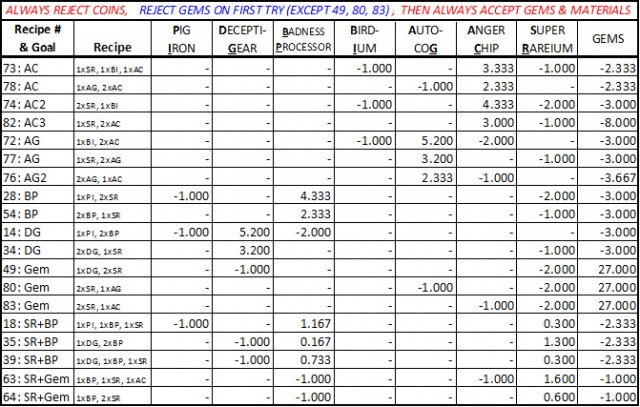
With this strategy it is much easier to design combinations of recipes to build up all materials in your silo (except BIRDIUM and PIG-IRON, as there are no recipes that yield these items). This is done with a small cost, on average, in gems. However, you can then rebuild those gems, with recipes # 49, 80, 83.
Here are some suggestions for maximizing the lab:
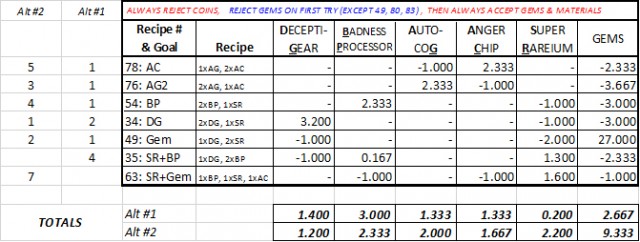
– Use 76 (AC) and 78 (AG) to rebuild these two items. Net cost is only a few gems.
– Use 34 (DG) and 54 (BP). Net cost is SR and gems.– Gems + SR: a lot of people like recipe #63 to rebuild gems and SR, but it uses BP + AC. Consider instead, using 35 for SR and 49 for gems. This alternate combo takes advantage of the fact that 35 uses DG which is easy to obtain and does not consume BP on average, and then 49 also uses DG, which again, is very easy to rebuild with 34.
Here is a comparison of the average output from these two alternate strategies. The actual number of times running each recipe is not as important as their ratios.
In addition, the condition of *your* silo and how many gems & coins you have or need, matter a lot. Clearly if you’re short on gems, you’ll modify the above to suit your situation. In fact, if you’re short on coins and in a hurry to rebuild them you can completely redesign the above, aiming for maximum coins with the least investment in materials or time rebuilding the materials used.
~~~~~~~~~~~~~~~~~~
An up-to-date Excel workbook of all this and more can be found HERE.
ENJOY !!
- You must be logged in to reply to this topic.