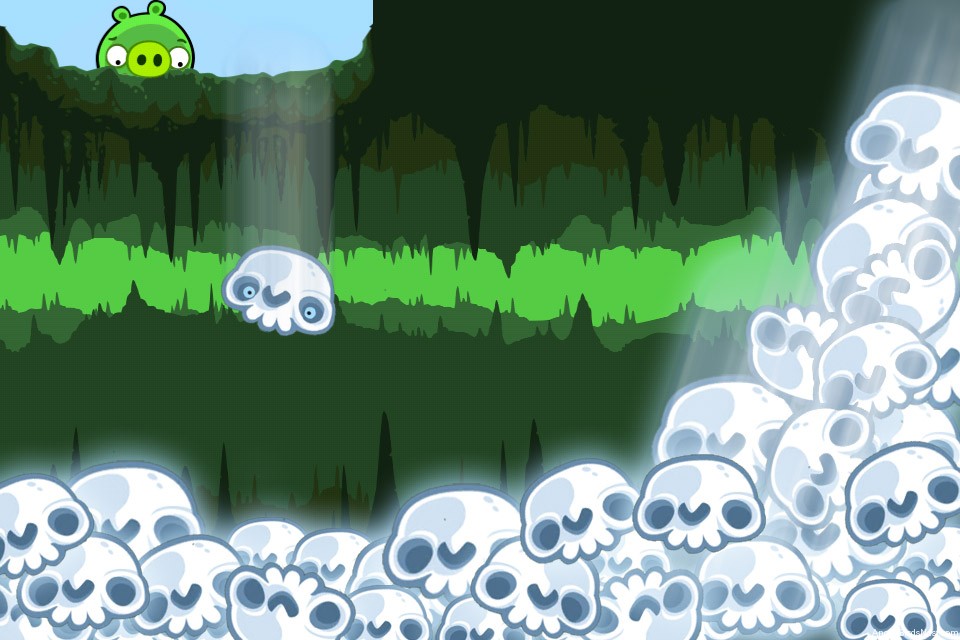
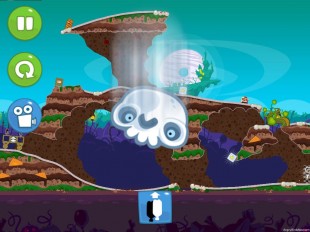
Welcome to the our complete guide for the Hidden Skulls in Bad Piggies. This organized guide will help you find the location of every Hidden Skull, as well as the contraption you could build to retrieve it! Click on the image or title of any skull below to check out the walkthrough video. Be sure to use the table below to jump between episodes.
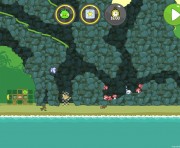
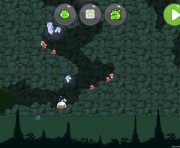
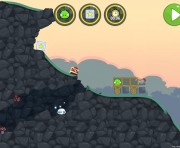
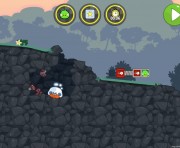
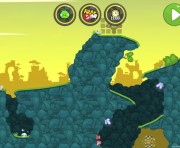
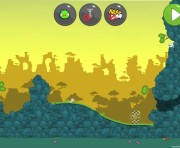
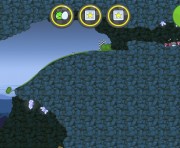
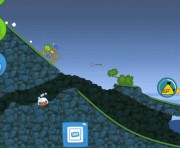
If you zoom out just a bit you’ll see a skull to the left, down the ravine. Build a contraption with the fan on the right to slowly navigate your vehicle to the left until it crashes on the skull below.
Video Walkthrough
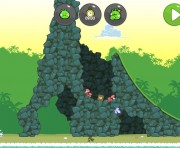
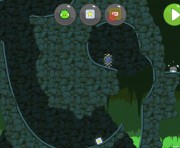
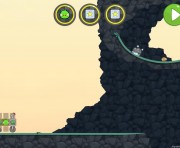
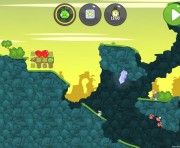
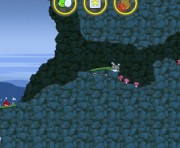
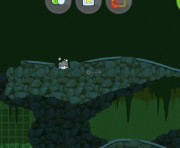
If you zoom out, you’ll see a skull to the left, in the depression behind the star box. Build a contraption with the soda bottles on each side to slowly navigate to the left, over the hill, until it crashes on the skull below.
Video Walkthrough
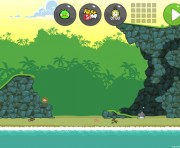
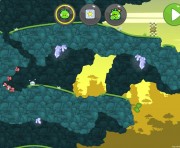
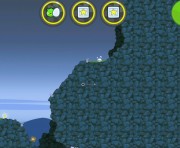
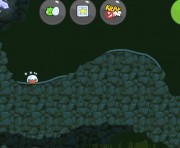
If you zoom out, you’ll see a skull on the ground to the right. Build a contraption with the fan and the electric engine to slowly navigate your to the right, so that the pig rolls down the cliff onto the skull.
Video Walkthrough
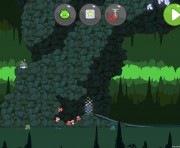
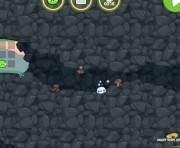
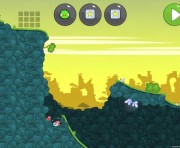
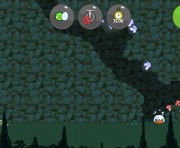
If you zoom out, you’ll see a skull in the cave to the right. Navigate your pig into position on the hill to the left. Detonate the TNT to send the pig flying very high above the mountain. The pig should land on the grass patch above, then roll down in the tunnels onto the skull below.
Video Walkthrough
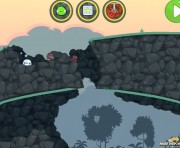
If you zoom out, you’ll see a skull on the ground below to the left. Build a unique contraption with two blocks over the right wheel, and one block over the left wheel. Place the pig on top of your vehicle. Now navigate to the left with the help of the air pump. The pig should simply roll on the wooden blocks, over the small rock, and fall down the ravine on the skull below.
Video Walkthrough
If you zoom out, you’ll see a skull on the ground below to the left, in front of the cave exit. Build a high contraption, and place the pig on top. Navigate slowly to the right. The pig should roll down the tunnel onto the skull below.
Video Walkthrough
If you zoom out, you’ll see a skull to the left, on the side of the mountain. Build a high enough contraption, and place the pig on top. Navigate slowly to the left. The pig should roll down the tunnel onto the skull below.
Video Walkthrough
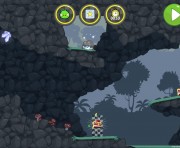
If you zoom out, you’ll see a “moustache” skull in the cave below. Build a high enough contraption, and place the pig on top. Launch your contraption high to the left using the soda bottles. The pig should roll down the tunnel onto the skull below.
Video Walkthrough

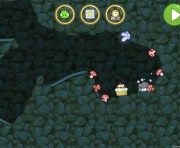
If you zoom out a bit, you’ll see a skull above the starting point. Build a contraption using a tnt box and soda bottles. Launch your contraption high by detonating the TNT. Then quickly trigger the gas bottles so that the pig is sent to the left on the skull above. Timing is crucial!
Video Walkthrough
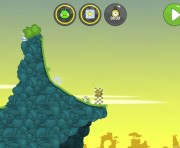
If you zoom out a bit, you’ll see a skull to the right, on the side of the mountain. Build a contraption using the umbrella and soda bottles. Launch your contraption high, above the mountain by triggering the gas bottles. Then quickly open the umbrella so that the contraption glides towards the skull.
Video Walkthrough
The skull is located to the right of the starting point. All you have to do is place Freckles on the ground with a boxing glove behind him.
Video Walkthrough
The skull is located above the starting point. Place Freckles above a four frame contraption, and a boxing glove below him. The glove should send him flying through the opening above so he lands on the skull.
Video Walkthrough
The skull is located to the left of the starting grid. Use a box or two with a grappling hook facing left to pull the pig into the wall, causing him to fall onto the skull below.
Video Walkthrough
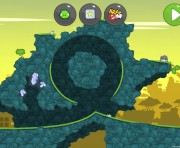
The skull is located above the starting grid. Speed along in a normal-looking cart, shooting your grappling hook at the edge of the skull’s platform. The cart will loop around, but you may have to manually release the hook to reach it.
Video Walkthrough
The skull is located to the left of the starting grid. Use a single metallic box and a leftward-facing grappling hook to swing your piggy into the cavern.
Video Walkthrough

The skull is located to the left of the starting grid. Place the piggy outside of the vehicle itself, and problem the contraption leftward to push it over the wall and down onto the skull.
Video Walkthrough
The skull is located to the right of the finish line. It is a little challenging to grab this skull without triggering the level to end, but a good strategy is to create a 3-box cart with small wheels and downward-facing boxing gloves. As the cart passes over the hills at the bottom, use the boxing gloves to leap over the finish line and into the skull.
Video Walkthrough
The skull is located to the left of the starting grid. Place both boxing gloves next to the piggy, and put a spring on the pig’s left. This will help give him enough high to clear the steep wall next to him, protecting the skull.
Video Walkthrough
The skull is located high above the finish line, and is very difficult to reach. Create a vertical contraption with a boxing glove aiming up at the piggy. Ride the low road all the way to the finish line, and prepare to fire the boxing glove. Timing is key as the contraption tilts, launching the piggy high into the cave above.
Video Walkthrough
The skull is located at the far-right of the level. Use the same contraption as in a normal 3-star attempt, but use the grappling hooks to keep moving rightward instead of drifting back left for the finish line.
Video Walkthrough
If you zoom out just a bit you’ll see a skull above and left of the finish line. Proceed the same way you normally would on the level, but avoid both the finish line and the box to reach the skull.
Video Walkthrough
If you zoom out, you’ll see a skull off the cliff to the left of the starting platform. Build a bellow-propelled unicycle of doom to go crashing down to the bottom.
Video Walkthrough

The skull is directly above the starting area, but not easily accessible. Build your contraption to go leftward via the bellow and rightward via the fan.
Video Walkthrough
The skull is to the right of the starting area, partially hidden behind a bush. Build a similar contraption as going for the box, but pop balloons earlier to descend to the middle level.
Video Walkthrough
The skull is way over on the right side of the level, and not easily reached. Build something that looks like a pickup truck and very slowly make your way through the lowest chasm. If you manage to get close, pump the bellow like crazy!
Video Walkthrough
The skull is straight down, at the bottom of the cliff. This is a bit deceiving, since it’s very difficult to fall that vertically. Create a small plane and very slowly roll off the ledge.
Video Walkthrough
The skull is at the extreme right, high above the finish line. The strategy here is almost unsatisfying. Create a little rocket ship and angle it via an unattached wheel. Blast off! If unsuccessful, just try again.
Video Walkthrough
The skull is above and a bit to the right of the starting location. The idea is to launch off the ramp to the left to loop over structure in the way. Unfortunately, if you clear the obstruction, you have way too much momentum to drop on the skull, so use fireworks to slow down. It’s very tricky business.
Video Walkthrough
The skull is along the top path in the third gap. Float your airplane to the top level, but neglect the big ramp. Proceed right instead, then use the propeller to very slowly drop into the gap.
Video Walkthrough

The skull is at the extreme right, near the finish line. Fly your heli-plane along the bottom of the level, but before reaching the checkered flag, use a firework to blast back to the left. The “moustache” skull awaits.
Video Walkthrough
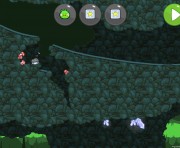
The skull is down the first gap, in the rightmost trough. This is rather difficult to reach, but the idea is to slow your contraption down as much as possible, trying to squeeze through the gap and bounce to the far right.
Video Walkthrough
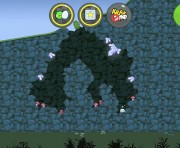
The skull is beyond the finish line, through a narrow cave, making it very difficult to approach using this weak airplane contraption. Travel over the finish line, landing the front wheel within the cave so the propeller can pull the contraption to the skull.
Video Walkthrough
The skull is located at the extreme right of this very long level. Make your contraption as thin as possible, using only the wheels, propeller, and engines to make your way across the level. When you arrive at the cave, just let the contraption naturally fall along the bumpy path until you reach the skull at the bottom.
Video Walkthrough

The skull is above and a slightly to the left of the starting location. Make your contraption using the balloons but point the second set of soda bottles to the right. You want to quickly propel your contraption to the right with the black soda bottles, wait for it to be lifted by the balloons through the opening. Finally, once you gained enough altitude, boost your contraption leftward and pop the ballons upon reaching the skull.
Video Walkthrough
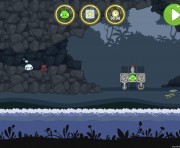
The skull is in the small cave to the right of the slingshot. Using the same copter contraption used to collect the stars, make your way up to the star box to avoid being hit by the birds. Then slowly navigate your way towards the Skull.
Video Walkthrough

The moustache skull is located above the starting point. Build a wheeled contraption with two bottom tnts, and the pig on top. Let the contraption slide down the slope and detonate the tnt when it reaches the bottom of the hill. The pig should be sent flying high to the left, onto the skull.
Video Walkthrough
The skull is located on the far right, top right when you zoom out. Use the same contraption, as if going for three stars. Navigate your vehicle all the way to the far right star box. Then detonate the tnt to send the pig high towards the skull.
Video Walkthrough
The moustache skull is located in the first gap on the hill. Build a simple vehicle with the tnt, placing two rockets pointing left. Then simply let it roll down the hill, triggering the rockets slightly before the opening. The contraption should reverse it’s course and land in the gap.
Video Walkthrough
The helmet skull is located above the starting point. Stack the pig and two tnt boxes, on the right most column. Detonate to send the pig through the opening. It should land onto the skull.
Video Walkthrough
The skull is located above the starting point, slightly to the left. To collect this skull, we built a “copter” on wheels with a blue rocket in front, pointing to the left. Carefully navigate your contraption through the cave and the opening above. Once your vehicle clears the gap, trigger the rocket to propel your pig towards the skull.
Video Walkthrough

The skull is on the left side of the first chasm at the beginning of this level. It will take a bit of control in the face of instability to earn!
The skull is located in the extreme top-right corner of the level. Just beyond the final arc before the star box, obtaining the skull requires reversing direction toward the end of a very long run!
The skull is left of the starting grid. Create a little shelf-like cart with soda bottles to propel it leftward, dropping Freckles over the ledge
The skull is to the left of the starting grid. Use the grappling hook to crawl your way over the wall and into the cave beyond.
The skull is in the extreme top-right corner of the level and nearly impossible to reach. But absolutely nothing is impossible for us at AngryBirdsNest! Be sure to check out our video to see how to blast away into the night.

