Mighty Falcon

Millennium Falcon Walkthrough Hoth Level 3-20

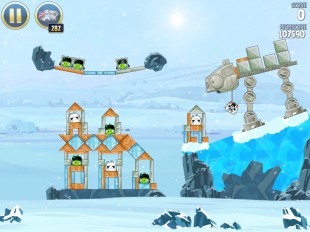
Here is our Millennium Falcon Gold Medal video walkthrough for Angry Birds Star Wars Hoth level 3-20. Time your shot carefully, aiming the Egg between the laser cannon and the TIE Fighter above the deck...

Categories
Tags
2

Millennium Falcon Walkthrough Hoth Level 3-19

Here is our Millennium Falcon Gold Medal video walkthrough for Angry Birds Star Wars Hoth level 3-19. This is a very precise strategy, but it yields the result desired. Aim the Egg straight ahead. The...

Categories
Tags
1

Millennium Falcon Walkthrough Hoth Level 3-18

Here is our Millennium Falcon Gold Medal video walkthrough for Angry Birds Star Wars Hoth level 3-18. Fling the Egg upwards, trying to place it just under the AT-AT’s chin. Don’t worry if you...

Categories
Tags
1

Millennium Falcon Walkthrough Hoth Level 3-17

Here is our Millennium Falcon Gold Medal video walkthrough for Angry Birds Star Wars Hoth level 3-17. Fling the Egg straight ahead, landing it on the pile of blocks in front of the AT-AT. Be careful to...

Categories
Tags
1

Millennium Falcon Walkthrough Hoth Level 3-16

Here is our Millennium Falcon Gold Medal video walkthrough for Angry Birds Star Wars Hoth level 3-16. Fling the Egg straight ahead, aiming for the AT-AT’s knee. Call for the Millennium Falcon upon...

Categories
Tags
1

Millennium Falcon Walkthrough Hoth Level 3-15

Here is our Millennium Falcon Gold Medal video walkthrough for Angry Birds Star Wars Hoth level 3-15. Pretty straightforward strategy here: Fling the Egg ahead and call for the Millennium Falcon when the...

Categories
Tags
2

Millennium Falcon Walkthrough Hoth Level 3-14

Here is our Millennium Falcon Gold Medal video walkthrough for Angry Birds Star Wars Hoth level 3-14. Two strategies here. One is to fire the Egg straight ahead and let it settle along the stone in the...

Categories
Tags
1

Millennium Falcon Walkthrough Hoth Level 3-13

Here is our Millennium Falcon Gold Medal video walkthrough for Angry Birds Star Wars Hoth level 3-13. Fling the Egg toward the foot of the AT-AT’s dangling leg. Call for the Millennium Falcon when...

Categories
Tags
3

Millennium Falcon Walkthrough Hoth Level 3-12

Here is our Millennium Falcon Gold Medal video walkthrough for Angry Birds Star Wars Hoth level 3-12. Easy instructions this time around: Simply toss the Egg into the bottom-left corner of the main tower....

Categories
Tags
1

Millennium Falcon Walkthrough Hoth Level 3-11

Here is our Millennium Falcon Gold Medal video walkthrough for Angry Birds Star Wars Hoth level 3-11. Toss the Egg straight ahead, calling for the Millennium Falcon when the Egg is above the first Probe...

Categories
Tags
1

Millennium Falcon Walkthrough Hoth Level 3-10

Here is our Millennium Falcon Gold Medal video walkthrough for Angry Birds Star Wars Hoth level 3-10. Toss the Egg over the first tower and into the tentacles of the Probe Droid. Call for the Millennium...

Categories
Tags
1

Millennium Falcon Walkthrough Hoth Level 3-9

Here is our Millennium Falcon Gold Medal video walkthrough for Angry Birds Star Wars Hoth level 3-9. The general strategy is pretty simple, but hard to execute: Loft the Egg to land in the chute on the...

Categories
Tags
1

Millennium Falcon Walkthrough Hoth Level 3-8

Here is our Millennium Falcon Gold Medal video walkthrough for Angry Birds Star Wars Hoth level 3-8. The general strategy here is pretty simple: Time the shot to avoid the laser blasts, and fling the Egg...

Categories
Tags
1