How to Unlock All the Angry Birds Chrome Dimension Levels
In the new Angry Birds Chrome Web version there are special Chrome Dimension levels that are unlocked by finding secret Chrome logos throughout the levels. Below is our first pass at a guide to help you find and all the logos and unlock the levels.
Last update added Chrome Dimension levels 19, 20, and 21 below. Full update log

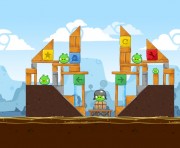
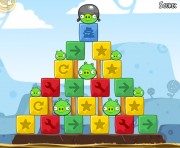
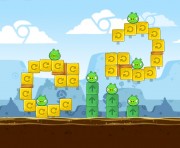
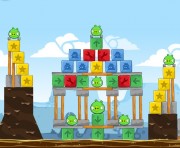
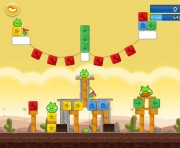
Chrome Dimension Level #1 Found in Poached Eggs Level 1-16
To unlock this level zoom out and shoot a yellow bird up to the ledge in the sky to smash the logo.
Video Walkthrough
Chrome Dimension Level #2 Found in Poached Eggs Level 1-18
The logo is on top of the cliff to the far right. Zoom out and nail it with a yellow bird.
Video Walkthrough

Chrome Dimension Level #3 Found in Poached Eggs Level 1-20
If you zoom out you’ll see the Chrome logo swaying in the breeze above you. Time it right and victory is yours!
Video Walkthrough
Chrome Dimension Level #4 Found in Poached Eggs Level 2-4
Zoom out and you’ll see the Chrome logo way over yonder behind them bolders.
Video Walkthrough
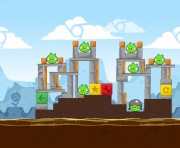
Chrome Dimension Level #5 Found in Poached Eggs Level 2-20
This one is a bit tricky! If you zoom out you’ll see the logo on the far right behind a tall wall. The best way to get this one is with the white bird. Launch it at the very last pig and drop the egg bomb right on top if him. The explosion should be enough to snag it!
Video Walkthrough
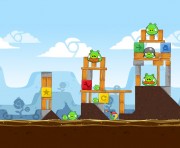
Chrome Dimension Level #6 Found in Poached Eggs Level 3-7
Dude! It’s right there in front of the slingshot. Bounce red bird off the structure, but don’t pull the slingshot back all the way or you’ll overshoot it.
Video Walkthrough
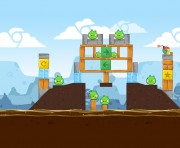
Chrome Dimension Level #7 Found in Poached Eggs Level 3-14
Zoom out and you’ll see the logo nestled in the nook behind the slingshoot. Shoot a red bird every so gingerly backwards to hit it.
Video Walkthrough
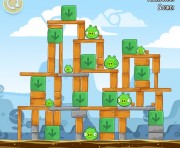
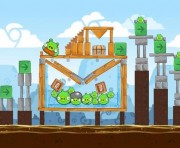
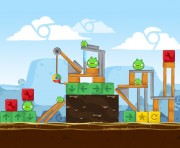
Chrome Dimension Level #8 Found in Mighty Hoax Level 4-4
Use the yellow birds to inflict enough damage on the bridge over the Chrome Logo then lob a Yellow Bird up at the right angle to snag it.
Video Walkthrough
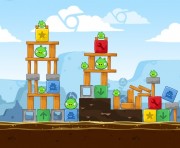
Chrome Dimension Level #9 Found in Mighty Hoax Level 4-13
Zoom out and you’ll see the Chrome logo on the far right hand side of the level. With some good aim you can destroy it using any one of the birds.
Video Walkthrough
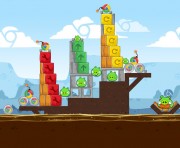
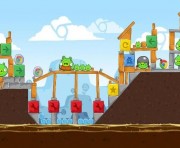
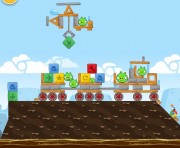
Chrome Dimension Level #10 Found in Mighty Hoax Level 5-5
First zoom out and you’ll see the logo on the right. This one is kind of tough, as you have to use a white bird to knock a piece of the stone structure over so that it lands on and destroy the Chrome logo.
Video Walkthrough
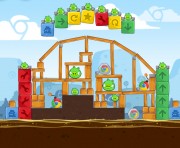
Chrome Dimension Level #11 Found in Danger Above Level 6-9
First zoom out and you’ll see the logo swinging in the top-right corner. This is a difficult, high-arcing shot with the Yellow Bird, but get the timing right and you’ll reach it.
Video Walkthrough
Chrome Dimension Level #12 Found in Danger Above Level 6-13
First zoom out and you’ll see the logo perched atop the tree. Another high-arcing shot with the Yellow Bird should reach it, but it may be easier to rebound off of the wall behind the logo.
Video Walkthrough

Chrome Dimension Level #13 Found in Danger Above Level 7-8
First zoom out and you’ll see the logo to the right of the bus. The easiest approach is to place the Black Bird in the middle-right of the bus and hit the logo with debris. You can also roll a White Bird across the roof of the bus and onto the logo.
Video Walkthrough
Chrome Dimension Level #14 Found in Danger Above Level 8-2
First zoom out and you’ll see the logo to the right of the plane. Launch the Yellow Bird towards the rear of the plane, then speed boost through the tail to reach the logo.
Video Walkthrough
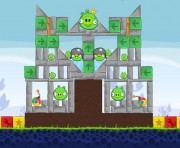
Chrome Dimension Level #15 Found in The Big Setup Level 9-8
The logo is dead-center in the middle of the structure. The logo is rather easy to get following a basic 3-star strategy. Clear a path with two Big Brothers before lofting the third to pass vertically through the rubble and onto the logo.
Video Walkthrough
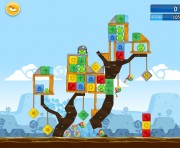
Chrome Dimension Level #16 Found in The Big Setup Level 9-14
Zoom out to see the logo on the extreme right, hiding under a hardhat. Use two Big Brothers to clear out the majority of the structure, then fire the Boomerang backwards, spinning back quickly to get a nice, horizontal path toward the logo. This one is pretty tough, but keep trying.
Video Walkthrough
Chrome Dimension Level #17 Found in The Big Setup Level 10-15
Zoom out to see the logo in the bottom-right corner of the level. Use one Big Brother to clear the top-left tower, then another to topple the top-right. Between Big Brother and the debris, something should grab the logo.
Video Walkthrough
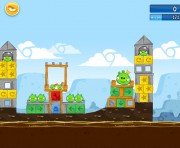
Chrome Dimension Level #18 Found in The Big Setup Level 11-3
The logo is tucked away under the slingshot platform. Fling a Big Brother vertically, as softly as possible, so he lands on the incline below and rolls back into the logo.
Video Walkthrough
Chrome Dimension Level #19 Found in Ham’em High Level 12-12
You must clear the opening below the big structure. This will allow you to comfortably shoot the yellow bird high and trigger straight onto the Chrome logo.
Video Walkthrough
Chrome Dimension Level #20 Found in Ham’em High Level 13-2
Unlock this level by zooming out first and locating the Chrome logo on the far right. You need to clear the way so that the white bird can reach and break the glass block.
Video Walkthrough
Chrome Dimension Level #21 Found in Ham’em High Level 14-9
This one is pretty straight forward to unlock. Aim the red bird towards the wall, he will bounce back and roll on the ground under the slingshot. Voila!
Video Walkthrough
Update Log
- September 4th, 2012 added Chrome Dimension levels 19 thru 21
- August 7th, 2012 added Chrome Dimension levels 15 thru 18
- April 6th, 2012 added Chrome Dimension levels 11 thru 14
- December 2nd, 2011 added Chrome Dimension levels 8, 9 and 10