Apple Game Center Tutorial & Getting Started Guide

Here at AngryBirdsNest.com we get so many questions about Apple’s Game Center (“What is it and how do I use it?”) that we decided to put together this handy guide that will walk you through each step of getting Game Center set up and configured. So let’s get started.

First off, what is an iOS device? An iOS device, in short, is any handheld device that runs Apple’s iOS Operating System. That includes any iPhone, iPod Touch, and iPad. Though the 6th generation iPod Nano has a similar screen and icons, it is not considered an iOS device.

So now we know which handhelds are iOS devices, but can all of them run GameCenter? Saddly, no. Game Center is compatible with the iPhone 4, iPhone 3GS, iPad, iPad 2 and the 2nd thru 4th Generation iPod Touch. Also those devices must be updated to at least iOS 4.1 or higher. If you’re not sure which OS version you’re running, tap the Settings icon, then General, and finally About. Scroll down until you see “Version” and check your number. If you don’t see at least 4.1 it’s time to upgrade (I actually recommend keeping your device as up-to-date as you can, it’ll help with bugs and app compatibilities).

Updating your device is easy. Connect it to your computer (be sure it has an active internet connection) and go to iTunes. After it’s connected your device will show up in iTunes in the left hand pane. Click on it and then click on Update in the right hand pane. Simple as that! Your computer will now download and install the latest software. It goes without saying, but be sure not to untether your iOS device while it’s updating.

Game Center Icon on Homescreen

Now that your device is compatible and updated it’s time to sign up!

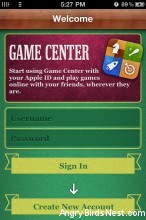
Game Center should have left a new icon on your home screen. If you don’t see it on your home screen you may have to search for it, but it’s there, trust me. Once found, tap on the icon and it will ask you to either sign in or create a new account.

Already have an Apple ID?

If you already have an Apple ID then you don’t have to create an account. If you opt to sign in using your existing Apple ID then you can skip the step about creating your profile, as you will still need to create a unique nickname.

If you don’t have an Apple ID just follow the steps below.

Creating a New Game Center Account

Step 1: Confirm your country or region. If you don’t see your country in the dark green box, tap on it and it will let you choose. Tap Next.

Step 2: Enter your date of birth then tap Next.

Step 3: Read through the terms and conditions then tap Agree

Step 4: This is where you sign up for an Apple ID. Fill in your first and last name, email and create a password. You’ll then be asked to select a security question and answer. Tap Next.

Creating Your Profile & Choosing Your Nickname

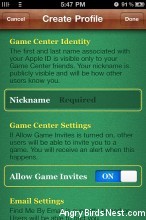
Once you’re signed in via your new or existing account comes the real challenging part…choosing the perfect nickname. Choose carefully, at this time you can’t change your nickname. Obviously you can’t have a nickname that is already in use, so you may have have to take a couple stabs at finding the a unique nickname that suits you.

The other profile settings (“Allow Game Invites”, “Email Settings”) are pretty self-explanatory, so just configure them based on your personal preference.

After you’ve found your nickname and configured your settings just tap Done and you’ll be ready to rock-n-roll.


Inside Game Center

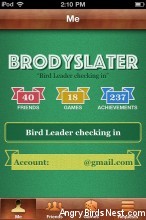
The Me page shows how many friends and Game Center connected games you have as well as your achievement points. The “Status” area works much like a Facebook status message. It’s just a little area to say something to your friends.

The Friends page shows all of the friends you’ve connected with on game center. To add your first friends, tap on the plus sign in the top right. You’ll be asked to enter in the email or nickname of the person whose friendship you’re requesting. Fill in the info and tap Send. They will be sent an email or a push message letting them know you’d like to be friends. If you tap on the name of a current friend it will show you their profile. You can then click on any games you may both own to compare stats.

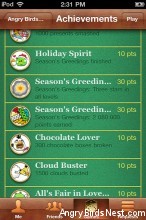
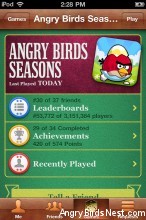
The Games page shows all of the games you have that are game center compatible. Tap on a game to access Leaderboards (rankings), Achievements and to see friends who have Recently Played.

Lastly you have the Friend Request Page. Any requests for friendship that are sent to you will show up here. Tap to accept or ignore any invitations that come in.

And there you have it! The ins and outs of Game Center. Now get out there, make some friends and start racking up those achievement points! If you need a friend, Bird Leader, can be found in Game Center as “BrodySlater” and FujiToast can be as just that, “FujiToast”.

Note: As some have noticed, there is an icon on the main homescreen for AngryBirdsNest.com. If you too would like an icon on your homescreen, simply follow the steps below!

Step 1: First open safari on your iOS device.

Step 2: Go to AngryBirdsNest.com.

Step 3: Tap on the icon that looks like a box with an arrow pointing to the right.

Step 4: Tap Add to Home Screen.

Step 5: This will open a menu and allow you to name the icon whatever you might like. Tap Add

And just like that, you have quick access to ABN on your homescreen, custom icon and all. Enjoy!
Tags: , ,
Category: Guides

Comments (83)

By Paul

Hi
I just change the new id apple with new email .after I change my all game data from game centre loss and need play again from starts.Have any change can get back the game data back ? I have play my favourite game dragon vale been long time . I don’t want loss this data ….:( thank you

Rank: Sling God with 32120 points
By AMslimfordy (@amslimfordy)

Re-playing levels should force GameCenter to update with the existing game data.

By Paul

How to re-playing or how to do it? Can you tell me how to do?please

Leave a Reply

Your email address will not be published. Required fields are marked *